Thursday, April 2, 2020

Avial

Looking at the bright side of a pandemic, the benefits are many and great. Limiting travel gave a break to the environment, sky, air & our lungs. On the social side, the virus gave us an opportunity to reconnect with family & home. I am meditating both morning and evening & have started watching both sunrise & sunset, this helps me to compose myself.
Health wise, the virus reminded us again of the importance of health, personal hygiene, sterilisation, disinfectants and healthy eating.

Having said that, It's been almost 2 weeks since I've stepped out. I usually buy veggies every week. This time around since we knew there could be possible lockdown, I did buy a little extra but I've managed to exhaust all of them.

There was this last carrot, a couple of beans & some more of the last ones. These were not enough for anything & as I was raiding the fridge for every vegetable I could lay my hands on, My dear friend from Qatar called & I was complaining to her as to how I had no idea of what to cook, the malayalee in her was quick to say, you always have enough to make a Aviyal. That's so true you always have enough veggies to make a Avial, anything and everything can go into this dish.


Aviyal is a traditional Kerala dish of mixed vegetables, An important component of the Onam Sadya. I am not very sure about what all veggies go into the traditional recipe. Here in this recipe, I've used the veggies that was available at home. (No rules recipe :))

Ingredients 

Assorted veggies - Cut lengthwise (I used Carrot/Beans/Potato/Raw Plantain) - 3 Cups
Turmeric powder - 1/2 tsp
Water - 11/2 Cup

Grind
Pepper powder - 1/2 tsp
Grated Coconut - 1/2 cup
Green chilly - 3 to 4 (Depends on how spicy you like it)
Jeera - 1 tsp
Water - 2 Tsp

Plain Yogurt (whisked) - 1/4 Cup
Coconut oil - 2 tsp (Any oil of your choice)
Salt
Curry leaves

Cooking Method 

Grind all ingredients from pepper powder, coconut, chilly, jeera & water into a thick paste.
Cook the veggies with turmeric powder, water (1.5 cups) and salt, The veggies should have a crunch & not get mushy
Add the coconut paste.  Cover and cook till the raw taste of coconut paste is gone.
Add yogurt and mix well. Cook for 2 minutes more & finally add the coconut oil and curry leaves.

Note : 
- I have made it watery as this was the only dish I made for the day, Ideally this is more of a    accompaniment/side dish which is thick in consistency.
- Yoghurt is optional, you can alternatively add 1 tsp tamarind or lemon juice


Wednesday, April 1, 2020

Eggless Caramel Cake

We have been on a no-sugar diet for over 2 years now, so I have not baked a cake for long,  But staying at home means we feel like indulging once in a while to keep the spirits high. Salted caramel is my favourite flavour in ice creams, I have tried many caramel cake recipes, but this one is the best as its easy, quick & yummilicious.


This eggless caramel cake uses curd and milk as a substitute for egg and turns out soft, moist and absolutely delicious.

Makes 1- 8″ cake

Ingredients

Soft Butter - 1/3 cup
Brown sugar - 1/2 cup
Plain Yoghurt - 1/4 cup
Milk - 1/2 cup
Vanilla Essence - 1/2 tsp
All purpose flour -1 1/4 cups
Baking Powder -1 tsp
Baking Soda -1/2 tsp
Salt -1/2 tsp
Caramel Syrup - 1/4 cup - see below

Baking method

In a mixing bowl cream together butter and sugar. Add milk, curd & caramel syrup, beat until incorporated. The batter will look curdled, but that's okay.

Mix together  all the dry ingredients  - flour, baking soda, baking powder and salt in a bowl.

Add the dry ingredients to the butter mixture and beat until all the ingredients are incorporated.

Pour the batter in to greased, lined and dusted pans.

Preheat oven to 180°C. Bake it for 30-40 minutes or until a skewer inserted comes out clean.


Caramel Syrup

Ingredients
Dark Brown Sugar-2 cups
Water-1 /2 cup + 1 cup

Procedure
In a heavy bottom pan, add 2 cups of sugar and 1/2 cup of water. Let it boil

The syrup will start bubbling after the boiling stage, at this stage the colour of the syrup will change to darker brown, you home will be filled with the caramel aroma.

Add the remaining 1 cup of water little by little, while maintaining a safe distance from the stove.

Once the water is fully incorporated, let it boil for 3-4 minutes.

Caramel syrup is ready. The syrup will look thinner but it will thicken as it cools. Transfer to a jar & refrigerate. Use it for cakes or as a spread on a warm bread with a dash of salt.


Tuesday, March 31, 2020

Kerala Style Red Cowpea and Pumpkin Curry (Mathanga Erissery)

This lock down has triggered all of the emotions we ever had, we laugh, we panic, we cry, we bounce back. As we juggle through these emotions & deal with the constant mind chatter, we must understand that all that a human mind needs is certainty & a feeling of well being which is no where around us now.

Just tell yourself that this need for certainty is not necessary now. It is only a thought or feeling. Don’t believe everything your mind tells you. Thoughts are not statements of facts. They are just thoughts.”. Also practise gratitude and happiness in everything that you do, it will have a ripple effect on the rest of the family.

One of my favourite quotes has been "What does not kill you makes you stronger". I am sure mankind has seen many such unprecedented situations and we are built to evolve and conquer. 

This recipe is a traditional kerala recipe, Kerala is the southernmost state in India & this dish is usually prepared during festivals. One of my all time favourite vegetarian dish, the merger between the sweetness of the pumpkin, creaminess of cowpea & the fragrance of coconut takes your taste buds to a different level.  I have had different versions of this curry, my favourite used to be the one prepared by my childhood friend's mother. She made the bestest version of this Erissery, I could eat bowls of it for all 3 meals & never get bored.

Whenever my mother made this dish, she would cook the cowpea with just salt & give me a bowlful with Jaggery & coconut. This tradition is not lost :D


As I relive those amazing childhood memories, here is the recipe(my version) 


Ingredients

Red Cowpea (Karamani) - 1 cup (Soaked overnight)
Pumpkin - 2 cups (Cubed)
Raw Banana (medium size) - 1 (Peeled, Cubed) Optional
Salt - 1 teaspoon
Turmeric powder - 1 teaspoon
Chilli powder - 1 teaspoon

Grind
Grated coconut - 1/2 cup
Shallots - 4
Garlic pods - 2
Green chilli - 4
Cumin - 1 teaspoon

Seasoning
Mustard seeds 1 teaspoon
Curry leaves 2 spring
Dry red chilli
Grated coconut 1/2 cup
Coconut oil / Any cooking oil

Cooking Method

Cook the soaked red cowpea, salt, turmeric & chilli powder in a pressure cooker, Open the cooker after the first whistle and add the pumpkin/banana & cook for 1 more whistle. Alternatively if your cooking on a stove top, you can cook the cowpea & the vegetables separately and add them together once done.

Grind together, coconut, shallots, garlic pods, chilli & cumin. Add the ground coconut mix to the cowpea/vegetable, Let it boil. Switch off the stove.

Heat 2 tsp oil in another thick bottomed pan. Splutter mustard seeds. Add dried red chilli and curry leaves. Once sauteed, add grated coconut. Fry the coconut until brown. Make sure you don't burn the coconut.

Add fried coconut mix to the cowpea gravy. Mix it well. Serve with rice / chapati 

Monday, March 30, 2020

Vazhapoo Vadai (Banana Blossom Fritters)

Life has almost come to a standstill after the lockdown announced by the governments. 
We slept in one world and woke up into another. 
We all go back to sleep each day hoping we wake up into a day where we can walk into a grocery store and pick that packet of pulses without wearing a mask & a glove. Eat from that favourite Cafe and walk that park just one more time. 
Each evening as I look back at those beautiful days, I try to create something special for our evening tea time, just a balm for our aching hearts & sinking spirits.

As we traverse through these painful days, may we never forget to preen our feathers, flex our muscles & stretch our wings for when we have to fly again, Let's make it the best flight ever.

More Power to all of you !


Let's get to the dish of the day. As South Indians we consider it as a sin to waste any part of the plantain tree, from ripe plantains to its stem we make the best use of every part of the tree :) This vada (Fritter) is made everytime we get a harvest from our plantain tree and its truly worth the pain it takes to make the VADAI. These Vadai's are crispy, spicy and a perfect snack with your evening tea.

This is how a Vazhapoo (banana blossom) looks like. The pinkish part of it is not edible and hence its to be discarded. Inside the pink covering is the flowers which should have turned into lovely banana's, these flowers are the edible part.

This is how the flower looks like.


Take each flower remove the hard stamen and the little plastic like thing below it and discard it.


                           The remaining part of the flower has to be washed and finely chopped.
As you keep peeling the flowers layer by layer you will find a white portion, this part is difficult to peel and can be chopped as it is.

Ingredients
Vazha Poo (Banana Blossom) - 1 (Cleaned and chopped)
Onion - 1 (Finely Chopped)
Chana Dal - 2 cup (Soak for 3hrs)
Green chilli - 3+1 (3 finely chopped)
Ginger - 2" (Finely Chopped)
Garlic - 6 pods (Big, Finely Chopped)
Curry Leaves - 10 (Finely Chopped)
Coriander Leaves - Small bunch (Finely, Chopped)
Onions - 3 (Finely chopped)
Jeera Powder - 1tsp
Asafoetida - 1/2 tsp
Salt

Cooking Method
Step 1
Finely Chop : Vazha Poo, Onion, Green chilli, Ginger, Garlic, Curry Leaves, Coriander Leaves and Onions.

Step 2
Grind 11/2 cup chana dal with 1 green chilli, jeera powder and asafoetida in to coarse paste. (Reserve 1/2 cup chana dal seperately)

Step 3
In a large mixing bowl, Add all the finely chopped ingredients along with the ground chana dal and 1/2 cup whole dal, Mix it well along with salt.
Set it aside for 20 minutes.

Heat oil in a deep thick bottom vessel, make small vadai's from the dough and deep fry till golden brown.

Serve it hot with a hot cup of tea.

Cooking Time : 20 minutes (excluding marination time)
Serves : Makes around 30 vada's (Depending on the size)

Tuesday, February 17, 2015

Date Palm Cake

There are some things that i cook with the sole intention of posting in the Blog. But even before I finish cooking it, it all vanishes in a jiffy, So there is no time for photography and in fact nothing left to check the taste of the final outcome. This is one such dish.

I have baked this cake at-least 10 times and it has been wiped off clean even before i picked the camera to start clicking. Although it is every cooks delight to know that the food is devoured, I am always left disappointed with the fact that I didn't click pictures for the blog.

So you better be careful when you bake this one..... Its going to be finished much before the cake cools down.

I read this recipe in a magazine, however i have altered it to suit my taste buds. Apologies for the not so appealing picture, trust me no one can stop with one piece.


Ingredients

Forty deseeded dates
One and half cup sugar / Jaggery
One and half cup Milk
One Cup - Cooking Oil
Two Cups - All Purpose Flour / Wheat Flour
1/2 Tsp - Baking Powder
1 Tsp - Baking Soda
Mixed Nuts - Optional

Baking Method 

In a Microwave safe bowl, Add the Dates and milk and Microwave for 2 minutes or until the mixture is hot.
Set aside and allow the mixture to cool down completely.
Grind the dates mixture along with sugar to a smooth paste. Add Cooking oil and give one last blend.
Sieve maida, baking powder and baking soda.
Add Maida mixture to the dates puree spoon by spoon until you can incorporate the entire flour into the dates puree.
If adding the mixed nuts, add now and mix well.

Grease a oven safe dish. Pour the cake batter  into the dish. Preheat oven to 180C and Bake for 40 min or until the knife comes clean.


Monday, February 16, 2015

Strawberry Dipped in Chocolate

After a harsh winter in Bangalore.....Yes, as per a bangalorean's standard the winter was HARSH!! You see we are one set of people who are always particular and picky about weather.. The summer usually comes with a riot of colors in Bangalore and It's beautiful to see Red and Juicy Strawberry's everywhere. Literally the streets are lined with fruit vendors showing off these red beauties and I just love my Strawberry Banana Milk Shake (Will share the recipe soon)

This time i had an important occasion and i wanted to use the fruit of the season to the fullest. This is the simplest and the most hazzle free kid friendly recipe. The easiest way to get the fruit to be eaten.


Ingredients

Strawberry - 1 Packet
Cooking Chocolate 
Sprinkles - your choice
Small Skewers
Stand / Cut Potato

Cooking Method

Wash strawberry in salt water followed by vinegar water and plain water, Dry it completely- This step removes all toxins, pesticides, I do it for all fruits.
Break the chocolates into small pieces, Melt it either in a double boiler or in a microwave.
Pierce the Strawberry stem side with a skewer stick.
Pour the chocolate over the strawberry.
Sprinkle the sugar balls
Pierce the Strawberry into the potato.
The chocolate will set in 10 min

Enjoy Strawberry dipped in chocolate with your favorite dessert.


Thursday, February 12, 2015

Makhan Gravy (The South Indian style)


Creamy, Tangy, Buttery and Tasty makhan gravy 

My favorite pass time is to observe families at the super market, usually the kind of things you see at their trolley, you can easily figure out the eating habits of the family. One such day while i was walking in the aisle of a busy store picking my groceries. I noticed this young family with 2 Kids, one boy and one girl both pushing separate trolleys picking their own Junk (Sorry food !!).  Both the trolley's were filled to the brim, overflowing with every variety of chips and biscuits. I was eager to know who the parents where and how they would react to this. As i neared the frozen section to pick some panner and curd, I saw the parents digging into the frozen parathas, cutlets, spring rolls and many many more things that i could not recognize. I heard the mother tell the boy "Beta, enough of all the junk you have taken, now take some burger buns, its going to be burgers for tomorrows lunch". All this while the father was eating a BIG bar of cadbury caramello right there even before billing. Phew !!!

My heart went out for these kids who would never in their life know the difference between Junk and Healthy food.

I have a huge regard and respect for young mothers and working woman who despite of their busy life feed their children with home cooked healthy food. This recipe is dedicated to all you people who cook and work towards a healthy and happy world (I mean actually cook !!)


Ingredients

Onion - 3
Ginger - 1"
Garlic - 10 Pods
Tomato puree - 200 gms ( 3 Big tomatoes, refer notes)
Cashew - 6 whole (Optional) - I didn't use
Red / Yellow / Green  Bell Peppers - 1 each chopped into big chunks
Paneer - 1 Packet (Chopped)
Onion - Peeled into layers and chopped into big chunks
Kasturi Methi - 1 Tsp
Amchur Powder - 1 big pinch (Optional)
Dhaniya Powder - 1/2 tsp
Jeera Powder- 1 tsp
Chilli Powder - 1 heaped tsp
Garam Masala - 1 Tsp
Jeera - 1 Tsp
Salt

Butter softened - 4 big tsp
Oil - 2 Tsp
Fresh Cream - 100 gms (Optional) - I didn't use
Milk - 200 gms
Water - 1/2 Cup

Cooking Method 


  • Grind onion, cashew, ginger and garlic into a smooth paste.
  • Heat Oil along with 1 tsp of butter, add jeera and once it crackles. Add the onion paste and fry on slow flame until the oil separates from the mixture. 
  • Add tomato puree, fry until the moisture is completely evaporated and the oil separates from the mixture.
  • Add salt, kasturi methi, amchur powder, dhaniya powder, jeera powder, chilli powder and fry well.
This red gravy is the main base masala for most north indian dishes, you can also make this in huge quantity and freeze it in ice tray. Once set, transfer the cubes into a ziplock cover and use.

  • Reduce the flame, add milk, water and garam masala, let the gravy simmer in low flame.
  • Take a separate wide mouthed vessel, add a tsp of ghee, Add Bell peppers and Onion. Fry on high flame until you get a slight charred effect on the skin. If you reduce the flame the veggies will start to give out water. 
  • Remove from flame and add into the simmering makhan gravy along with Paneer. 
  • Add fresh cream.
  • Simmer the entire gravy for 2 min add the remaining 3 Tsp of Butter and close the lid.
  • Serve hot with Butter Roti's. 

Notes
Tomato Puree : Boil water, add tomotoes close and allow it to sit for 15 min. Peel the skin and roughly chop the tomato. Grind into a smooth puree.
This is not the recipe for authentic north indian gravy, this recipe is born after a lot of trial and errors and definitely has a strong south indian touch.
I do not use Cashew and Cream on regular days, I use it only if i have guests coming over.
The most time consuming part is to ensure the tomato mixture is well fried on slow flame, if that is done then 90% of the recipe is completed.
The frozen gravy is a boon to all working and young mothers as it  stays fresh for over 15 days or even more.  (I haven't used beyond that )
The veggies can be altered as per your liking, you can add mushroom, peas, baby corn. Or even add some Chicken for the famous Butter Chicken Masala.


Cooking time : 30 Min
Serves : 4 Adults 


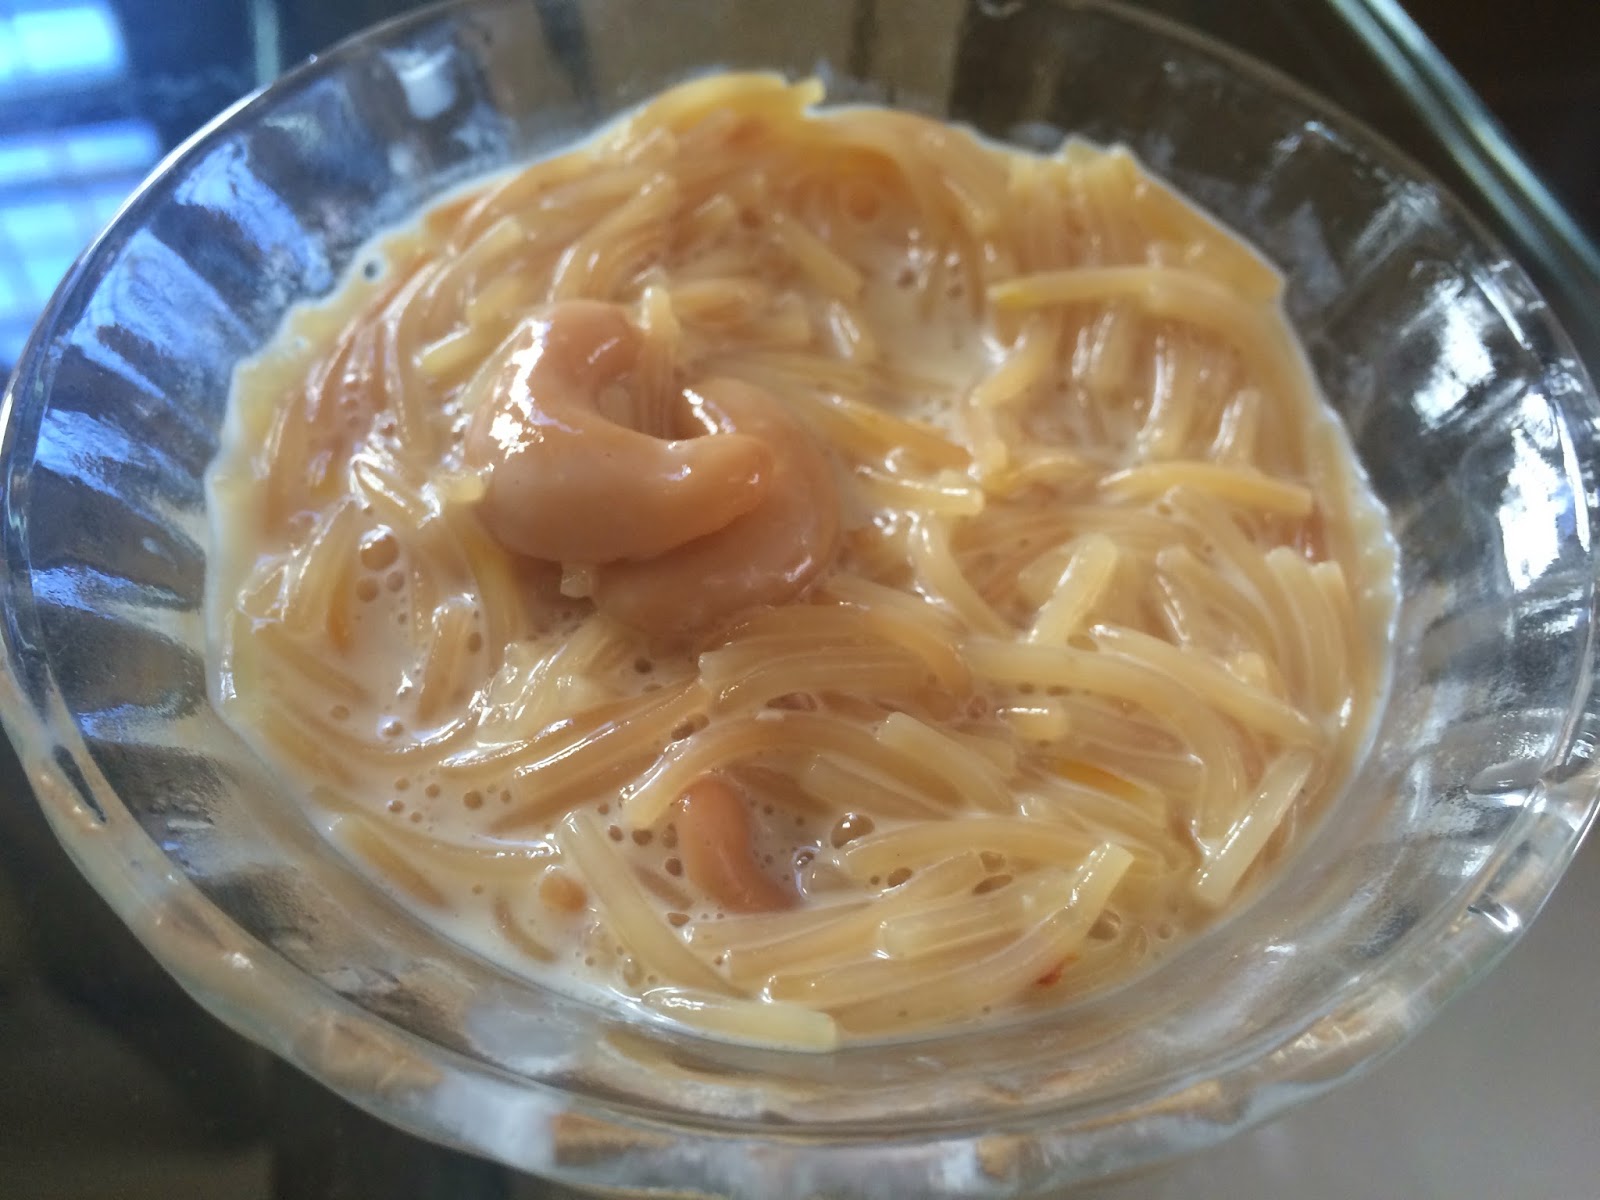
Semiya Payasam

This blog came into being only because of my mother and periamma, the worlds best cooks. This recipe is my mothers and the perfect recipe for a creamy delicious Semiya Payasam. If you are a sweet tooth then this is a must do recipe.

I enjoyed this when i had a terrible tooth ache as I had a strong craving for something warm & sweet. 

I managed to click some pictures as my mother was cooking. I hope you all enjoy making this delicacy as much as i did.


Ingredients

Semiya (Vermicelli) - 3 Cups 
Sugar - 4 Cups (As required)
Diluted Coconut milk - 500ml
Milk - 1000ml
Milk Maid - 1/2 tin
Dry grapes 
Cashew nut
Elaichi Powder
Saffron soaked in warm milk
Ghee

Cooking Method

Heat ghee and fry raisins and set it aside.
Fry Cashew nut in the same ghee and set it aside.
Add semiya to the remaining ghee and fry it on a slow flame until you get a good aroma.
Switch off the stove and allow the semiya to cool down a little.
Boil 1/2 cup water with the diluted coconut milk. (I used Maggie coconut milk powder)
Add semiya to the boiling coconut milk. 
Once the semiya is cooked, add milk and let it come to boil.
Add Sugar, Milk maid, Fried Cashew, Raisin, Elachi Powder, and Saffron soaked in milk.
Serve warm with lots of love.

Pictorial


Notes 
Add sugar only after the semiya is well cooked. Sugar usually arrests the cooking of semiya.
Let the payasam be a little watery as it tends to thicken as it cools down.
Add warm diluted milk when you want to reheat.
You can use only coconut milk or only milk for this payasam.
Add dry fruits as per your liking.

Friday, December 26, 2014

Oats-Dates Fudge Cake

One full year has passed by, good or otherwise, its still one full year, filled with learning, loss, happiness, vacations, memories, friends. 
At the end of each year, i would always say "This year went by so quickly, this is the first year, i felt suddenly everything slowed down. 
Each month was savored and filled with rich experiences. 
Now i have come to realize that the year did not slow down, its ME who has suddenly slowed down and learnt to live each day completely rather than thinking of tomorrow. 
I am enjoying this new "ME" where i don't just think of endless planning just to be in line with the society.

This new place that i moved to this year, has a very nice and healthy neighborhood. I have made a lot of new friends here. I must admit that good neighbors are a blessing.

This recipe is dedicated to all my lovely neighbors :)


Ingredients

1 Cup Wheat Flour
2 Cup Oats
2 Cups Chopped Dates 
1 Cup Cooking Chocolate
1/2 Cup Shredded Coconut 
1 Cup Butter
1/2 Cup Sugar
1/2 Cup Boiling Hot Milk
1 tsp Salt
1 tsp Baking Soda
1 tsp Baking Powder

Optional
Chopped Nuts
Choco Chips

Baking Method

Heat a thick bottom vessel and dry roast Oats until you get a nice nutty aroma, Add Wheat flour and roast until the raw smell of wheat is gone. Add coconut. Mix it all together and roast for 1 min. Remove from heat.

Add chopped dates, melted chocolate, butter, sugar, salt, baking soda and baking powder. Mix well with your hands if needed.

Add boiling hot milk and knead the dough well. (Add Chopped nuts now, if adding them)

Grease the baking tray, flattened the dough, Sprinkle choco chips.

Bake at 180 degree for 30 min.

Once out of the oven, make the markings for the squares, it would be difficult to cut it once it cools down.

Crumbly soft, crunchy oats square is ready :)

Baking time : 30 min
20 squares 

Saturday, November 29, 2014

Banana Walnut Cake

Super Soft, Moist fluffy Banana Walnut Cake.... This "NEVER FAIL" recipe was shared by a very dear friend.

Ingredients: 

1¼ cups Demerara sugar
1½ cups flour
1 large ripe banana, chopped into small pieces (should be about 1-1½ cups)
1 tablespoon butter
½ cup oil
100ml milk
2 large eggs
1 teaspoon cinnamon
1 teaspoons baking powder
1 teaspoon baking soda
2 teaspoon vanilla extract
Walnuts 


Baking Method: 


Grease baking tin. Line base with baking paper.
Add ¾ cup sugar and 1 tablespoon water to a saucepan. Bring to the boil and cook on high heat until the sugar turns dark red. Don't let it burn! - {despite the recipe's warning I have burnt it many times. So far so careful}.
Add the banana pieces, butter and vanilla and cook over low heat until the bananas break down into the caramel. Let the mixture cool completely.
Beat ½ cup sugar with eggs and oil until the sugar dissolves and the mixture turns pale.
Add the banana mixture and milk and beat well.
Sift the flour, cinnamon, baking powder and baking soda.
Fold the flour mixture into the banana mixture. Add chopped walnuts, Give one final mix
Pour the mixture into the tin.
Bake at 160°C / 355°F for about 40 minutes or until the tooth pick comes clean.

SERVE WARM